First and foremost, you’re going to want to log into your Amazon Seller Central account. If you do not have one of these, you will want to sign up since that is the only way you can access Amazon to build a campaign.
Step 1: Create Campaign
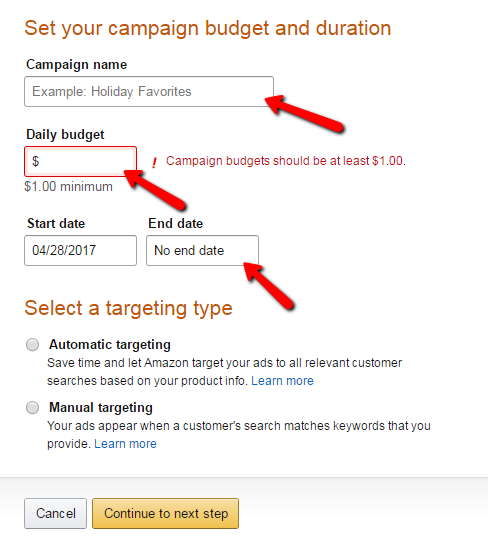
You will want to hit the yellow create campaign button on the top of the screen, if you don’t see that you will want to click on the campaign manager tab at the top of the page. From here you will want to do a couple things:
- Name your campaign
- Choose a daily budget
- Select a start and end date
- Select the targeting type you prefer
Step 2: Create Ad group

Choose a name for the ad group you are creating. You will want to choose a name that’s relevant to the products you will be advertising, which you will do on the next step.
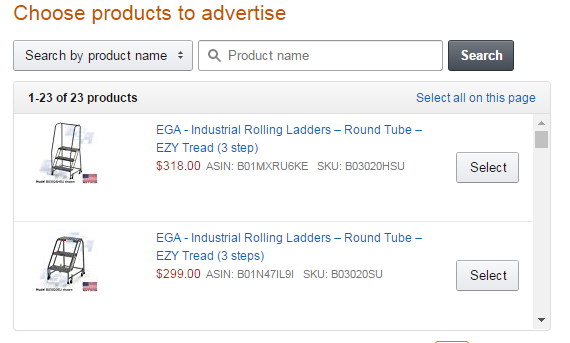
Step 3: From here you will want to select the products you would like to advertise in the ad group you are creating.
Step 4: Set Your Bid
Once you have chosen the products to advertise in this ad group you will want to select a default bid. Usually it’s good practice to start off lower and raise the bids as you gain more knowledge within your campaigns and ad groups.
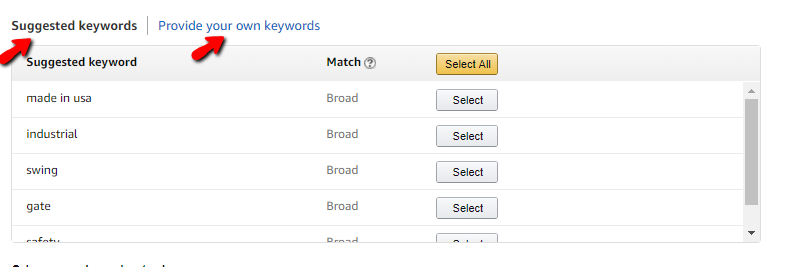
Step 5: Provide keywords
Here you will have 2 options to provide your own keywords or Amazon also provides a list of suggested keywords for your products. Sometimes these keywords can be very broad and it’s best if you use your own, but if you don’t have any ideas you can use Amazons list of suggested keywords.
Step 6: Save and Finish
The last step is clicking the save and finish button at the button of the screen. Once you click this, the campaign manager page should pop up with a message that says your campaign has been sucesfully created (if you have done it correctly).
Those are the steps that it takes to create a new campagin in Amazon Seller Central. All you have to do now is wait for your campaign to generate traffic and optimize from there.


